Thursday, July 23, 2015

More than Salt and Pepper has moved

Hi everyone,

For some strange reason Blogger sent out notification of an old post of mine to my subscriber list. I apologize if you received it. It's an old post from a few years ago and is now irrelevant. I am working with them to address the issue as I suspect it is probably some glitch. 

On another note, I'd like to let my subscribers know that as of now "this" More than Salt and Pepper blog is going to be deactivated soon. However, it's not going away because, as I have been mentioning for some time now, it is getting a much needed update. If you'd like to follow along, (I'd love that very much) you can now visit my new website at


On the menu bar, you will find More Than Salt and Pepper Blog. I hope that you come by and see other creative work that I'm working on. More than Salt and pepper will continue to evolve and I'd love to continue to share it with you. 

Have a lovely week!

-Camila Salgado

Friday, January 6, 2012

Chicken Tortilla Soup

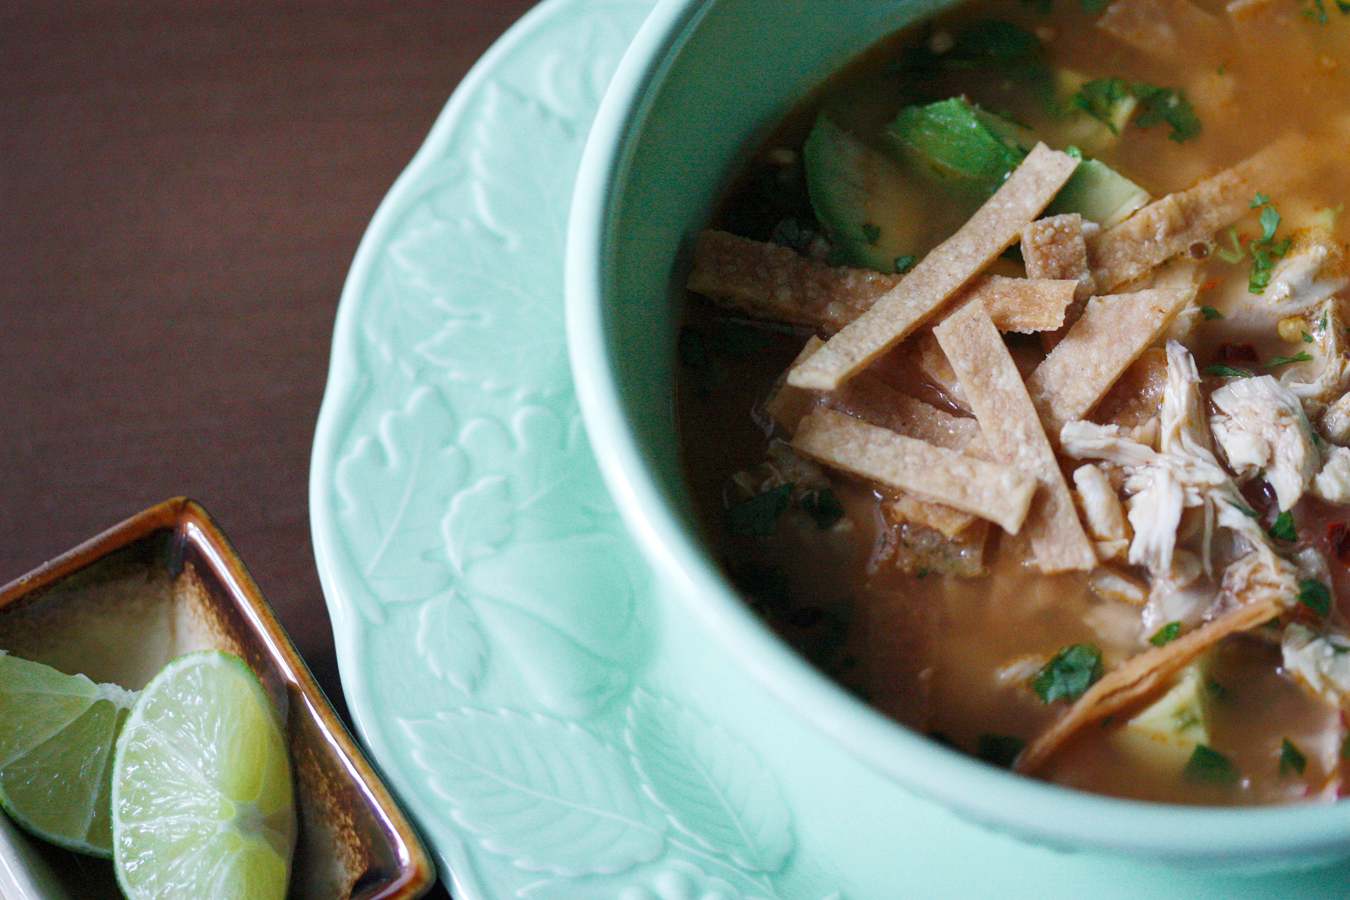
I like to experiment with different textures in my soups by using seasonal veggies or once in a while I drop in a handful of rice or chickpeas into the pot. This tortilla soup is packed with little chunks of chicken, cool crisp grated radishes, creamy and buttery avocado, crunchy strips of tortilla, and milky fresh cheese melting into a steaming, savory broth. Just imagine what all those textures and temperatures taste like in one spoonful! Here's how I make it.


For the stock
1 ½ lbs of chicken bones 
1 medium onion cut in half
1 garlic clove
1 medium tomato cut in half
1 or 2 sprigs of thyme
1 small sprig of marjoram 
1 small sprig of spearmint or mint
2 tsp of kosher salt
1 tsp chicken bullion
1 serrano pepper (optional)
1 small handful of cilantro 
9 cups of water

Base
2 cups diced onion
1 cup diced tomato
1 large diced garlic clove
2 tsp of chicken bullion

Trimmings for serving
grated queso fresco (Mexican fresh cheese or cotija)
grated radishes
diced avocado
chopped cilantro
fried tortilla strips
a lime cut into wedges
cracked red pepper flakes

Have you seen those packages of split chicken breast at the market that others ignore for the more "convenient already-deboned" chicken breast or tenders?  Well, when these go on sale I stock up because they're a better bargain and because I can get two meals out of one package.  Plus, when making a stock or broth the bones hold most of the flavor.

To make the stock...

Here is what I usually do. I run my knife between the meat and the bone and save the meat for another meal because all that I am interested in right now is the bones.  However, if you want a lot more chicken in your soup just drop the entire chicken breast pieces into the pot and shred the meat once its cooked.   
Cut the meat off the chicken breast bones but leave some chicken meat on them to be used for chicken soup later on.  Place all the bones from the split chicken breast in a stock pot.  I had some chicken breast bones saved from a previous time so I'm also adding them to the pot to equal about 1½ pounds.  
I prefer to use fresh herbs but if dry is all that you have that's fine. Just keep in mind that dried herbs have a bit stronger flavor. 
Place all the ingredients for the stock in the pot and add water, kosher salt, and chicken bullion. Add enough water to cover all of the ingredients and place the pot on medium-high heat until it reaches a gentle simmer. While it simmers make sure to skim off the fat and foam that will rise to the surface. 
Once the meat on the bones is fully cooked. Pick and set aside the meat and discard the bones. Strain chicken stock through a sieve discard all of the rest from the pot. 
Return the stock to the pot and keep over low heat. 


To make the base...

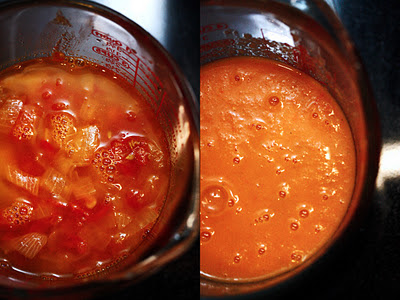
To make the base, drizzle a skillet with a bit of oil and saute the diced onion for about two minutes then add the diced tomato and garlic. Season lightly with a bit of kosher salt and remove from heat once the mixture is softened. Transfer the mixture into a blender, add about 1½ cups of water, blend well and set aside.
Transfer the mixture into a blender, add about 1½ cups of water, blend well and pour it into the stock and allow it to simmer on very low heat for about 5-10 more minutes and add the chicken meat. Taste and season with more kosher salt if necessary. 


To prepare the trimmings...

Cut tortillas into thin strips. Heat some oil in a skillet and fry them until golden brown and crispy
Transfer them onto a paper bag or napkins to soak excess oil and sprinkle them lightly with kosher or sea salt. Finally Grate some radishes, some queso fresco, and dice some avocado.


Finally, time to serve! Take your favorite bowl and drop in a handful of crispy tortilla strips, some diced avocado, some freshly grated radish and cheese.
Ladle the hot chicken broth into a bowl, sprinkle with chopped cilantro and cracked red pepper flakes if you like the extra spice. If you like, top it with more tortilla strips and dive in.
Don't forget a twist of lime it makes a world of difference! 


This recipe is a combination of two recipes, one is mom's and the other is from an episode of Martha Stewart that I saw years ago. I took the best from those recipes. If you decide to try it, I hope that you enjoy it.  


Saturday, August 20, 2011

Red Enchiladas: Morelia Style


Enchilar, is the act of smothering something in chile sauce, therefore, a tortilla that is dipped in chile sauce becomes a tortilla "enchilada". Morelia-style enchiladas are typically served with a side of steamed diced carrots and potatoes, shredded lettuce, slices of tomato, and sour cream.  It's a great vegetarian alternative. This is one of the few dishes that can be prepared by using the very versatile dry-chile enchilada sauce that I previously posted. 

Mom used to make these for us when there was a good amount of stale leftover tortillas that nobody wanted to eat anymore.  I will warn you that you will end up with a mess on your stove but it will be a delicious mess and it's well worth the effort. These enchiladas are filled with queso cotija.  You can also use queso fresco instead. Those two types of cheeses are fresh, soft, and creamy but are firm enough to grate. Cotija cheese has a saltier and tangier taste and the queso fresco is a bit softer, creamier, and less salty. 

Ingredients

1  1/2    cup of shredded queso cotija cheese
12-16    corn tortillas
    1/2    cup of finely diced onion
              dry-chile enchilada sauce  click here for the sauce recipe
              Sour cream 

Wrap tortillas in a cloth napkin and heat in the microwave for about 30 seconds to a minute or you can heat them on a hot griddle (no oil or butter) and turning them once or twice for a few seconds on each side.  You should be able to fold them without them breaking. Keep the warm tortillas wrapped in a kitchen towel.


Combine the diced onion and the shredded cheese and set aside.  This will be the filling for the enchiladas.  You can  adjust the cheese to onion ratio depending on your preference   
Prepare a little working station right next to your stove. Have your cheese mixture, warm tortillas, cookign oil, enchilada sauce in a wide bowl, and a large flat plate for rolling the enchiladas and a baking dish or container to place prepared enchiladas.  A baking dish with a lid works great because you can cover them to keep them warm while you prepare the rest. 

Preheat a skillet on medium to medium-high 

Dip one tortilla at a time into the sauce

Add a generous drizzle of oil to hot skillet. Immediately place the chile-dipped tortilla on the hot oil. Allow it to fry for about 10 seconds on each side just enough for the tortilla to be heated thoroughly. Adjust the timing on each side as necessary.  Do not let it crisp up too much or it will break when you roll the tortilla. 

  
When each tortilla has been fried on each side, pull it out of the skillet and place it on a plate, top with some of cheese mixture.
You may need to add a little drizzle of oil for each tortilla. If some of the sauce starts to dry in the hot skillet and smoke, simply scrape off dry sauce off with a spatula then wipe the skillet with some paper towels before you continue.

Finally, roll the stuffed tortilla into a taco and your first enchilada is ready!  (careful, the tortilla is very hot) Repeat the process until you have prepared all of the enchiladas.


To serve them, top with a dollop of sour cream and more shredded queso and a side of finely shredded lettuce and veggies of your choice. Typically, we steam diced carrots and potatoes with a little butter and salt and pepper as a side


Tips:
You will have sauce left. Save it! You can stir it into scrambled eggs, then sprinkle them with grated queso fresco and top with a dollop of sour cream.

or stir it into chicken soup or Chicken Tortilla Soup for a smoky, spicy flavor

Dry-Chile Enchilada Sauce


This is my dry chile sauce. Dried Chiles in Mexican cuisine is what sun-dried tomatoes are to Italian cuisine. There are countless varieties of dried chili pods (Poblano and Anaheim peppers for example) that are dried in the sun until they are dehydrated. This process gives the pods a smoky, woody and mildly spicy flavor with a subtle raisin or dried fruit-like sweetness.  
When selecting dried chiles, avoid the very dry weightless pods because this is an indication that they are old and no longer have any flavor. They should have a smooth, glossy skin and should  have a slightly supple leather-like texture. I use dry chiles in a lot of my cooking. Some of the most common and available to me are the Chile negro and Chile guajillo.

For the Sauce 

       4   garlic cloves
    1/4   medium onion sliced in strips
       8   dry guajillo chiles
       4   dry negro chiles
       3   cups of boiling water
1  1/2   tsp of Kosher salt
    1/8   tsp of Mexican oregano

Begin by preparing the Chiles.  Clean and remove the seeds from each pod. 


To clean them, take a damp kitchen towel and wipe the exterior of each pod making sure you clean between the folds and creases on each chile before you cut them open.
Cut open each pod, and with a spoon remove all the seeds.  You can control the level of heat in the sauce by removing the membrane on each pod. 


Removing the membrane will make a mild sauce

Once you have cleaned and prepared your chiles gather all of your ingredients, preheat a skillet and boil 3 cups of water in a saucepan.


Add a drizzle of oil to the hot skillet.  Place one pod at a time on the hot oil for a few seconds on each side, then set aside on a plate. The chiles will change to a lighter color and become very fragrant.  Be careful not to burn the chiles because that will make your sauce bitter. Repeat this step with each pod and set aside.


Keep the skillet on the heat. Add another drizzle of oil if necessary, then toss into it, the garlic and sliced onion and saute for about 3-4 minutes.

Add the chiles, onions, garlic, kosher salt, and the pinch of oregano, into the saucepan with the boiling water and allow to boil at medium heat for about 6-8 minutes. This will soften and plum the chiles and allow the garlic and onions to cook thoroughly. 


Pour the mixture into the blender and add 1/2 cup of icy cold water. (This will bring the temperature down a little bit).  Place lid on the blender and hold tightly shut with a kitchen towel when you start the blender to avoid any spills. Blend until very smooth.
Strain the sauce through a sieve. This is the finished sauce.  It should yield about 3 to 3 1/2 cups.

Now that you know have the sauce, you can use it in various Mexican dishes like these red enchiladas. 
For this recipe click here : Morelia Style enchiladas


Here is a link I found for reference on different varieties of dry chiles with very nice visuals and substitution for those of you who may have a hard time finding certain varieties.

Click here